Whether you are going to build a new PC or want to make a fresh start on your existing PC, you need to install Windows 11 ISO. Installation is a process that includes booting the installed disk and rewriting the new operating system on the drive. To build a bootable disk, you need to install the Windows file. You can write this file on a USB flash drive or use it as a standalone file to install Windows on a virtual machine. I have compiled this note to provide a detailed guide about Windows 11 ISO.
How to Get a Windows 11 ISO?
Start creating Verdict in seconds, and convert more of your visitors into leads.
There are two ways to download the Windows. The first way is to download the Windows directly from the website of Microsoft or download and write it directly to a USB flash drive with the media creation tool of the company.
The second way is to download the files from Microsoft`s server to create an up-to-date version of custom ISO with the tools from the site ‘’UUP dump’’.
Downloading the Windows 11 ISO from Microsoft:
Start creating Verdict in seconds, and convert more of your visitors into leads.
One of the simplest way to install Windows 11 ISO is direct downloading from the Microsoft website. Step by step guide is stated below:
1. Go to the Windows 11 Page:
The first step is to go to the Windows 11 ISO page.
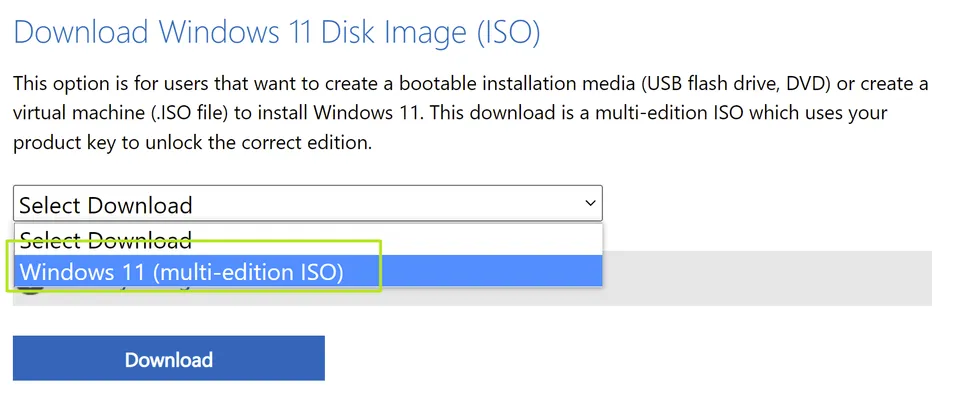
2. Choosing the Windows:
The 2nd step is to choose Windows 11 from the drop-down menu below the ‘’Windows 11 Disk Image (ISO)’’. If you want to create on a USB flash drive directly. Then download the Windows 11 installation Media tool from here.
3. Click on the Download:
Next, click on the Download button to start the download of Windows.
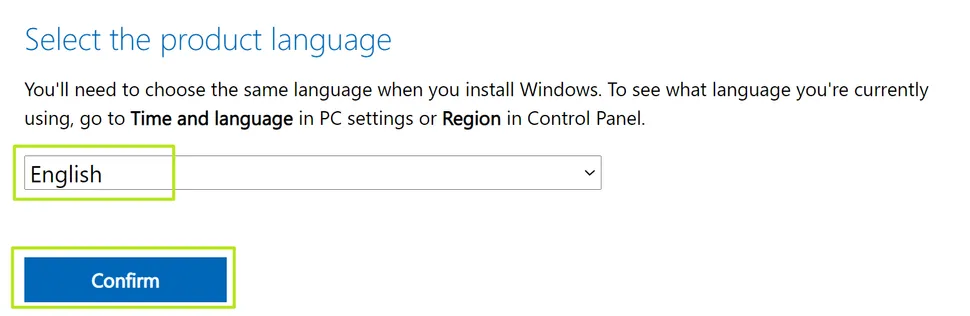
4. Select the Language:
After that, select the language from the drop-down menu and click confirm.
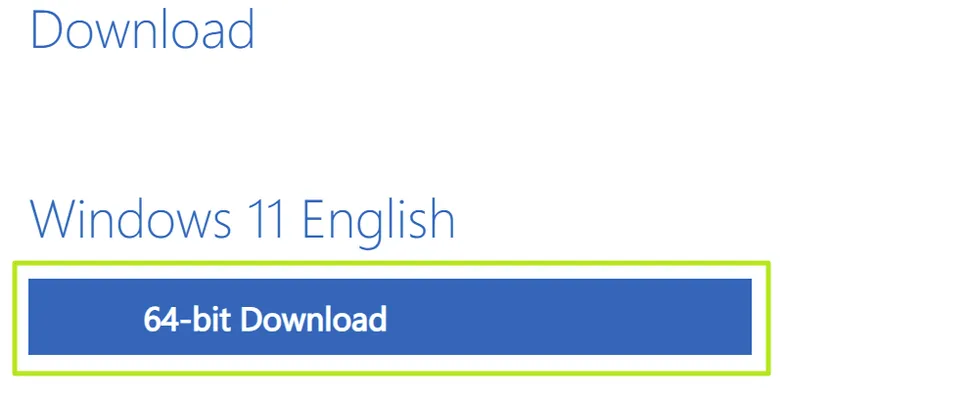
5. Click on the ‘’64-bit Download’’ Button to Start the Download:
After selecting the language, click on the download button, after that Windows will start to download.
Create Windows 11 Install Disk with Media Creation Tools:
Start creating Verdict in seconds, and convert more of your visitors into leads.
If you don’t want to keep the copy of Windows 11 ISO on your drive and want to create a bootable USB Windows 11 install disk. The best way to do this is through Microsoft’s media creation tool. Step-by-Step guide is stated below:
1. Connect the USB Flash Drive:
The first step is to connect the USB flash drive to your system. Flash drive storage space requirement is 8 GB at least and make sure there is no data on it. This process overwrites the entire disk.
2. Go to the Windows 11 Download Page:
The next step is to go to the website of Microsoft and navigate to the ‘’Windows 11 Download Page’’.
You can also proceed to download page through this URL, https://www.microsoft.com/software-download/windows11
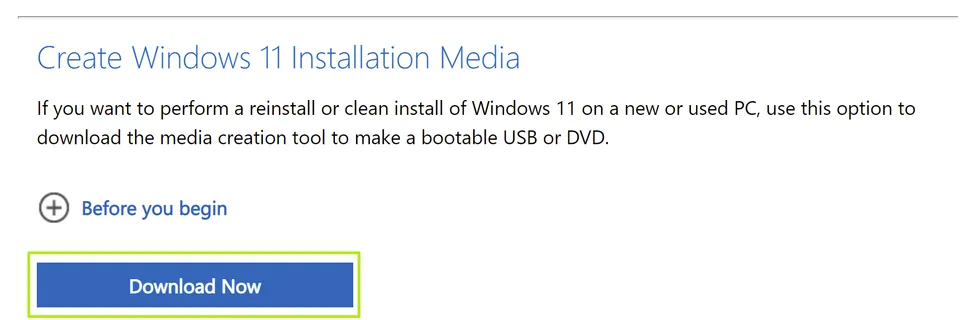
3. Click on Tab ‘’Download Now’’:
After going to the Windows 11 download page. Go to the button ‘’Download Now’’ below ‘’Create Windows 11 Installation Media’’ and click on it to download the Media Creation Tool.
4. Launch the Media Creation Tool:
The next step is to launch the media creation tool.
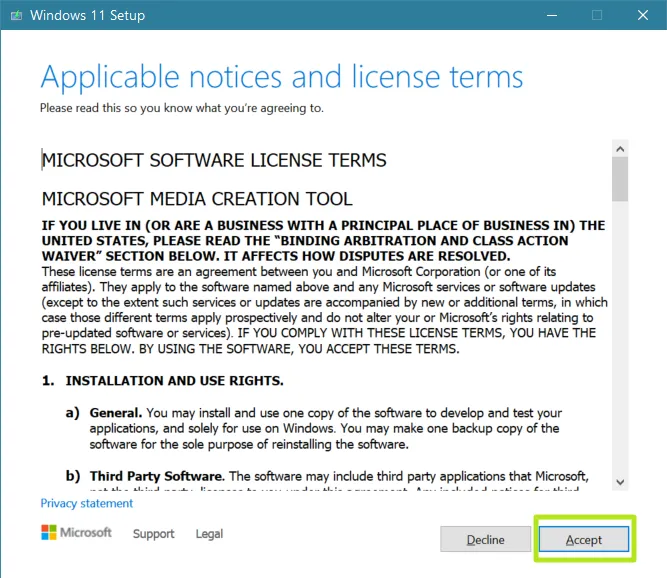
5. Click to Accept the ‘’License Agreement’’
Next, the License Agreement will appear on the screen. There are two options, one is Decline and the other is Accept. Click on accept to proceed further.
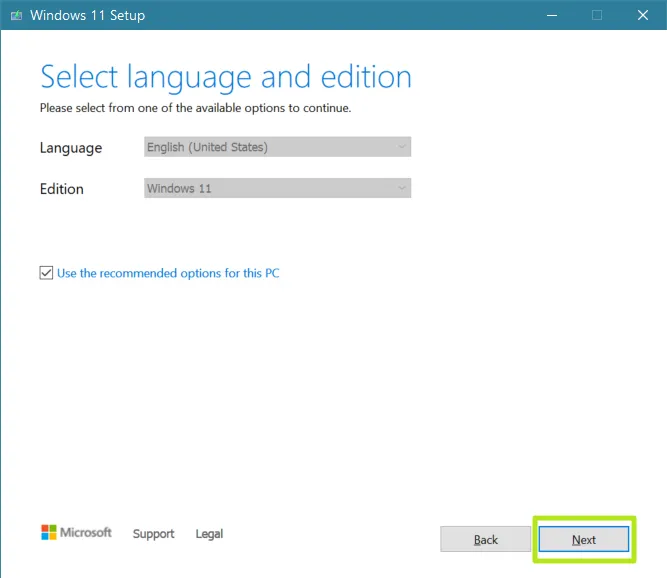
6. Choose the Language and Addition:
The next window will appear with two tabs for the selection of language and addition. Keep the choices default.
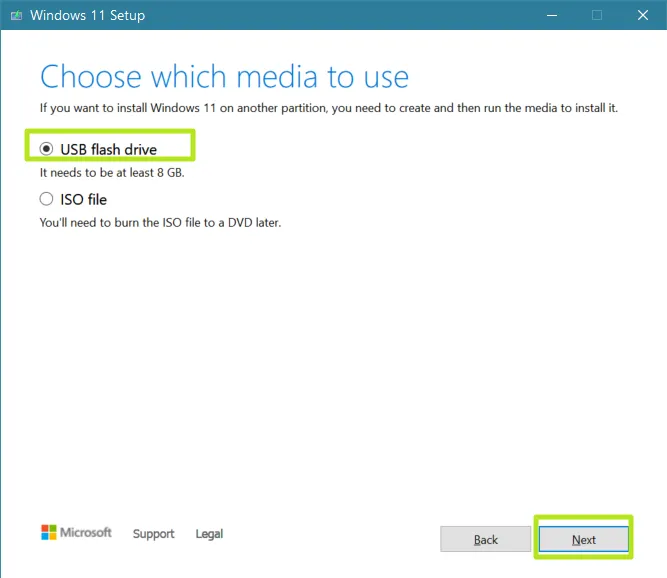
7. Choose the USB Flash Drive:
On the next Windows, select the USB flash drive, and click the next. You may also choose an ISO file and make an ISO file here. Otherwise, select the option USB flash drive and click on the Next. After that Windows will take several minutes to download.
8. Click on ‘’Finish’’:
When the download completes, the tab ‘’Finish’’ will appear and click on it, after that, the USB flash drive is ready.

Creating the Windows 11 ISO with UUP Dump:
Start creating Verdict in seconds, and convert more of your visitors into leads.
To install Windows 11 Insider Release Preview, there is a website named UUP Dump that enables you to download ISO files for installation. ISO files are directly downloaded from Microsoft servers and UUP Dump provides a batch file to download the basic files and convert them into an ISO. Step by Step guide is stated below:
1. Go to uupdump.net:
The first step is to go to the website i.e. uupdump.net.
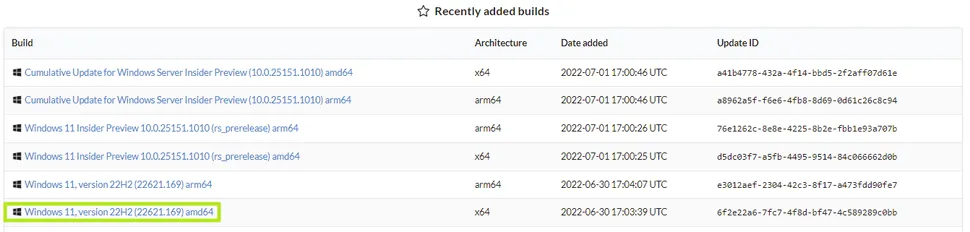
2. Select the recent version you want to download:
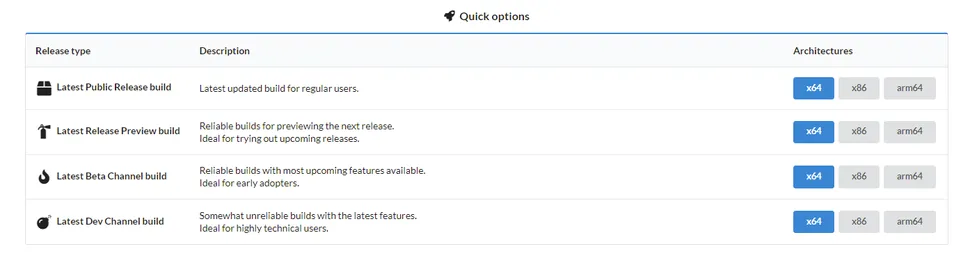
Scroll down to choose the build you want to develop for example x64. You need to choose among four choices.
- Latest Public Release Build:
This is the latest released version of Window and you don’t need to get it from UUP Dump.
- Latest Release Preview Build:
It is the closest insider image to be final.
- Latest Beta Channel Build:
It is a version in between the newest and most polished versions.
- Latest Dev Channel Build:
This is the newest and buggiest build that is available on the site.
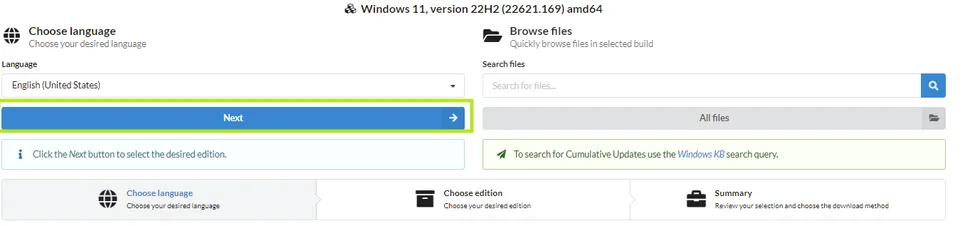
4. Choose the Language:
The next step is to choose the language and click on the button ‘’Next’’.
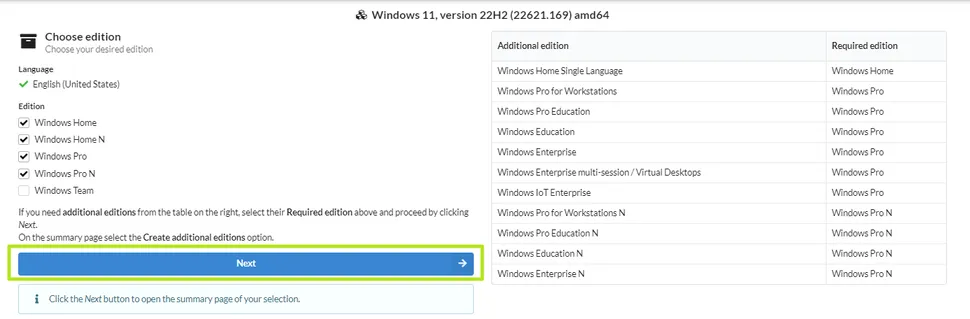
5. Select Among the Editions:
Select the edition you want to install and click on the Next. Here ISO, by default has both Windows Home and Pro versions. But to save the space, you need to pick one of them.
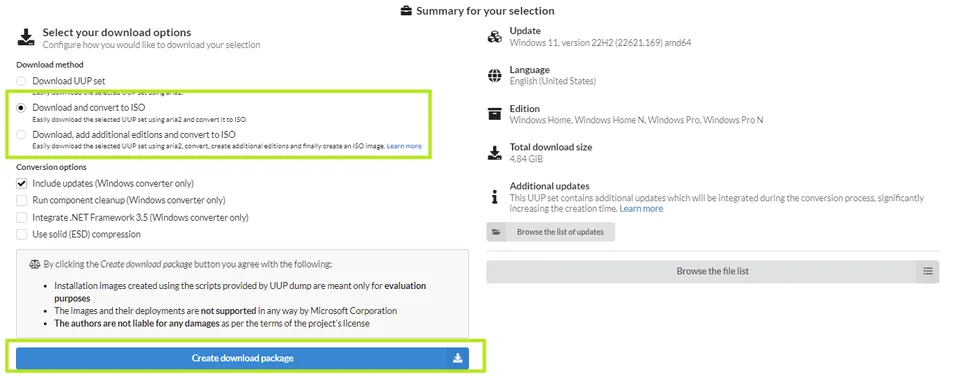
6. Select ‘’Download and Convert to ISO’’:
The next step is to select ‘’Download and convert to ISO’’ and tick on ‘’Include updates’’. After that click on ‘’Create download package’’, zip file will be downloaded to the system. It will be used to download the Windows 11 ISO.
7. Unzip the File:
Next, unzip the file save the contents in the folder and make sure that there is no space in the folder name.
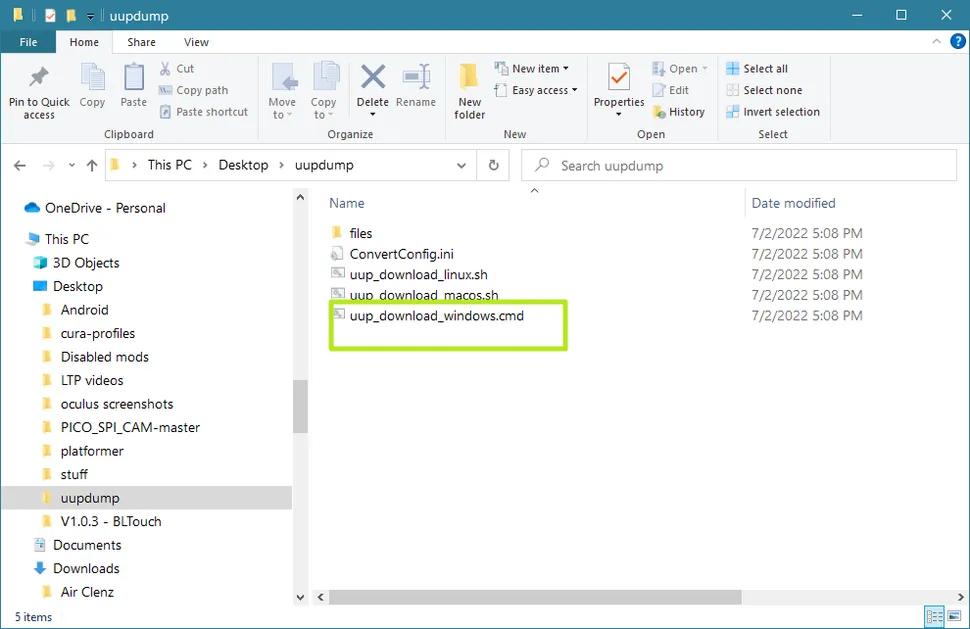
8. Double Click:
Double-click uup_download_windows.cmd in the folder with files already downloaded.
9. Click on ‘’Run Anyway’’:
Windows will display a message to warn you that it is an unrecognized app. Click on the option ‘’Run Anyway’’.
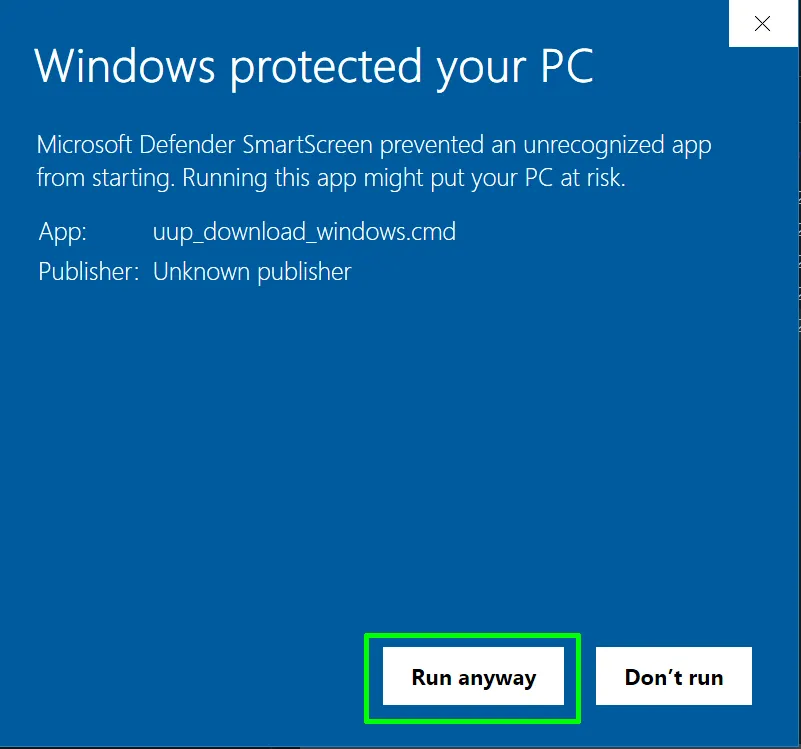
After that a command prompt window will appear, running the batch file to download files from Microsoft and to create Windows 11 ISO file. It will take several minutes.
10. Press 0 to Exit the Command Prompt:
When the download of Windows finishes, press 0 to exit. Windows 11 ISO file will appear in the folder. You have successfully downloaded the file.
Summing Up
Start creating Verdict in seconds, and convert more of your visitors into leads.
In this article, two main ways to download the Windows 11 ISO are described. You need to install the Windows file to build a bootable disk. You can download the file either stand-alone or on i USB drive. The first way is to download the Windows from Microsoft`s website. There is another option available which is downloading and writing it directly to a USB flash drive with the media creation tool of Microsoft. The second way is to download the files from Microsoft`s server with the tools from the site ‘’UUP dump’’. These two are the main methods that enable you to download Windows without any hassle.