Canva is one of those online graphic design software and tools that makes design feel less like a technical task and more like a creative playground. And if you have ever wondered how people manage to give their text that cool curved look in Canva like wrapping it around a logo or shaping it into a perfect circle, you are in the right place.
Curving text is one of those effects that looks fancy but takes literally seconds once you know where to click. In this guide, I am going to walk you through everything step by step.
Whether you are designing a logo, poster, or posts for social media platforms, I will help you curve text like a pro in Canva.
What is Curved Text and Why Use It?
Let’s start with the basics. Curved text is exactly what it sounds like, “Text that follows a curve instead of being straight across.”
This can be a full circle, a semi circle, or even just a subtle arc. It is often used in logos, badges, social media posts, and even thumbnails for a YouTube channel to create a more eye catching design.
I personally love using curved text when I want to make something feel a bit more dynamic. It adds visual interest without adding clutter. It gives your design a more custom, professional touch, especially if you are trying to stand out on a crowded feed.
Things to Keep in Mind When Curving Text
Curved text is awesome, but there are a few things you should be aware of to avoid design hiccups.
- Fonts and Curve Compatibility: Not all fonts look great when curved. Serif fonts or decorative ones may end up looking uneven or overly complex. Stick with clean, bold fonts for best results.
- Curve Limits and Design Balance: Don’t overdo the curve. If you make it too tight or too loose, it can throw off your entire layout. Keep it balanced with the other elements in your design.
- Mobile vs Desktop Experience: You can curve text in Canva’s mobile app too, but the interface is slightly different and a bit less flexible. I recommend doing it on the desktop if possible.
How to Curve Text in Canva (Step-by-Step)?
If you have never done it before, don’t worry. I am going to walk you through the whole process of how to curve text in Canva. You do not need to be a Canva Pro user to use this feature, and it works on both the desktop and mobile apps.
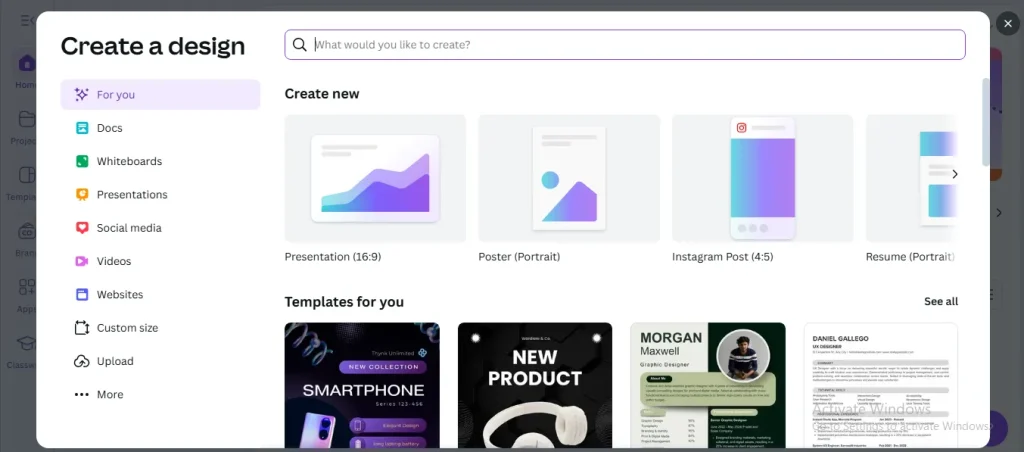
Step 1: Open or Create a New Canva Design
First things first, you need a canvas to work on. Go to Canva.com and either choose a ready made template or start a new design from scratch. You can select custom dimensions or choose something like “Instagram Post,” “Videos,” or “Presentation” depending on your goal.
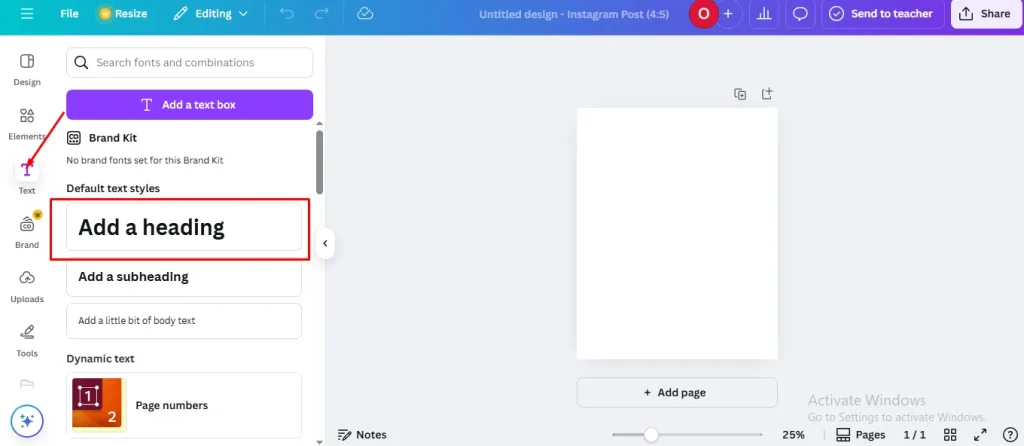
Step 2: Add Your Text
Next, you will want to insert some text. Click on the Text tab on the left panel and choose Add a heading, Add a subheading, or Add a little bit of body text whichever suits your design.
Once the text box appears, type in your desired message. You can change the font, size, and color even before you apply any effects.

Step 3: Use the “Effects” Menu
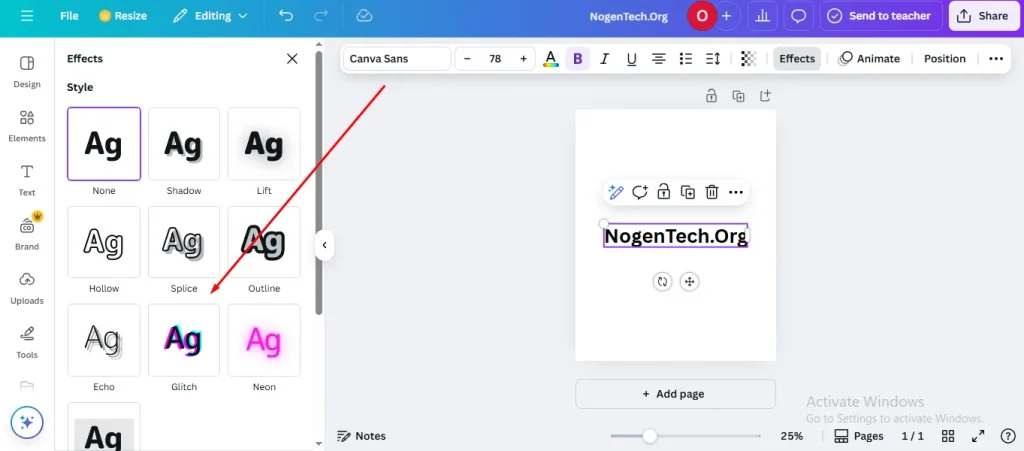
Now for the fun part. Select your text box by clicking on it. On the top menu, you will see a button called Effects. Go ahead and click that.
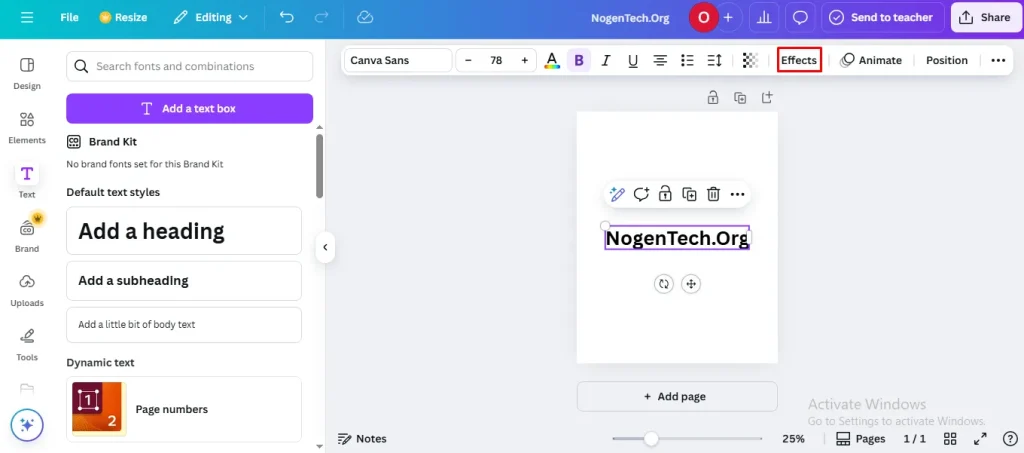
This opens a side panel where you will see different text effect options like Shadow, Lift, Hollow, and of course, Curve.
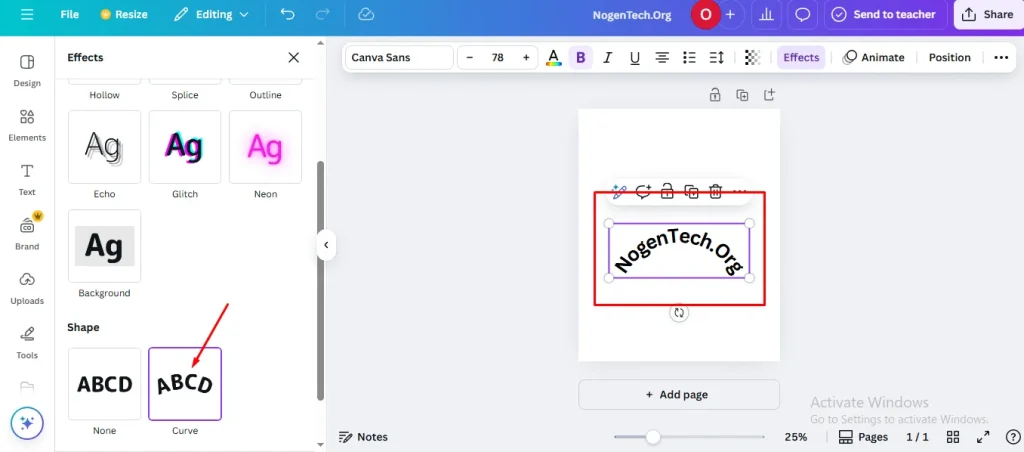
Step 4: Apply the Curve Effect
Once the Effects panel is open, look for the Curve option and click on it. Boom! Your text curves instantly. Canva automatically applies a default curve value, which you can tweak in the next step.
Step 5: Adjust the Curve Settings
Beneath the Curve option, you will see a slider that controls the degree of curvature. Drag it to the right to create a downward curve, or to the left for an upward arc. You can make it a full circle if you keep dragging far enough.
Play around with it until it looks just right. This part is where your personal style really kicks in.
Step 6: Style Your Curved Text
Now that your text is curved, you can go ahead and customize it further. Change the font style, size, color, letter spacing, and even add shadows or backgrounds.
Subject: ………………………………
💡Pro Tips: Certain fonts look way better curved than others, especially bold or script styles. So don’t be afraid to test a few options.
Tips to Make Your Curved Text Stand Out
Here is how to elevate your curved text so it doesn’t just look good but looks amazing.
- Use Contrast and Color Smartly: High contrast between the text and background makes it pop. If you’re working on a dark background, go for bright or white text and vice versa.
- Play with Letter Spacing and Line Height: These two small adjustments can make a huge difference in readability and style. Looser spacing often works better with curves.
- Combine Curved Text with Graphics: Layer curved text around icons, logos, or illustrations. It makes everything feel more integrated and intentional.
Common Mistakes to Avoid When Curving Text
Even experienced designers mess this up sometimes. Here is what to watch out for.
- Over-curving or Warping: If your curve is too extreme, the text becomes unreadable or looks distorted. Subtlety is your best friend here.
- Poor Font Choice: Avoid thin or script fonts that become illegible when curved. Stick to bold, legible options.
- Misalignment in Design: Always check that your curved text aligns well with other elements on your page. Eyeballing it is not enough. You have to use Canva’s guides and gridlines.
Need assistance to become a pro graphic designer? Check our guide on the Best Graphic Design Blogs you should keep following in 2025 to learn new skills.
Final Thoughts
These are the details on how to curve text in Canva. Curving text in Canva is a quick and easy way to bring life and movement to your designs. Whether you are working on a logo, flyer, or social media graphic, it is a feature worth mastering. What I love about Canva is how it makes powerful effects accessible to everyone without needing fancy software or hours of learning.
I hope this guide gave you the confidence to try it out and play with it in your own projects. The more you explore, the more unique and professional your work will start to look. So go ahead, curve away, and see where your creativity takes you.